News

Welcome to our Technical Information Pages!

The Defaults and Geographical Plugin in the Canon R6 MKIII

⬅️ Tip: Use your browser’s back arrow to return to the previous page anytime.
Click this tab bar to view each feature of the plugin
Standard Defaults
Restore Factory Defaults, Avoid Calibration Conflicts, Prep the Camera for Resale
Standard Defaults

With Standard Defaults, you can:

  • Reset some or all settings back to Factory Defaults.
  • Eliminate Calibration conflicts by resetting User or Custom Functions to Factory Defaults.
  • Reset the camera’s language back to English if it defaults into Japanese.
  • Reset Factory Defaults for Resale, which also removes the Previous Owner’s Settings.

⚠️ Before resetting User and Custom functions to Factory Default, be sure to back up the customer’s setting using the User Tab in Essential.

Buy Main Boards Internationally - Shop for the Best Price and Availability!
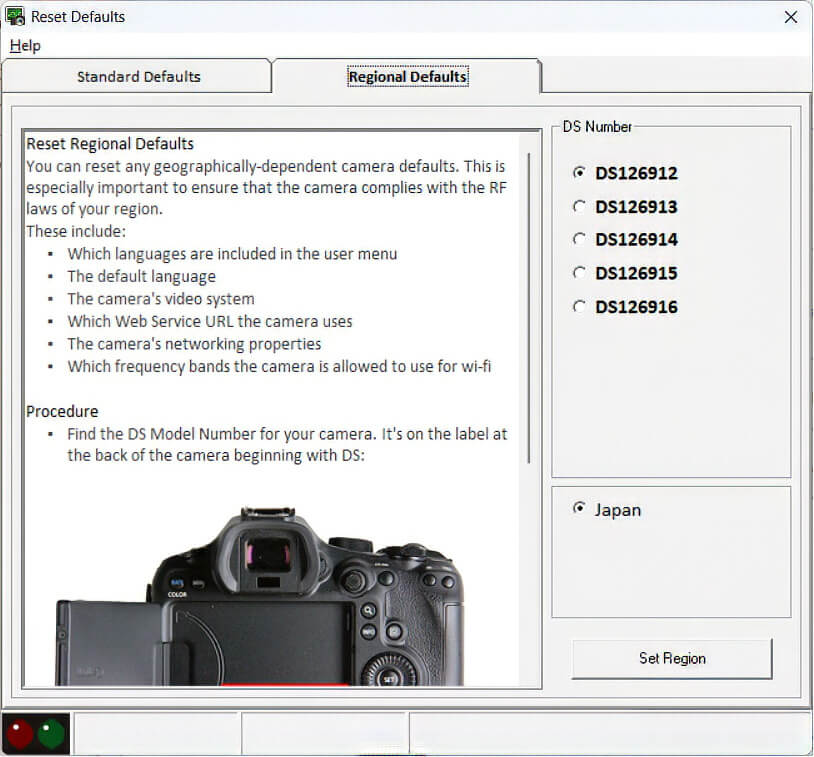
Regional Defaults

With Regional Defaults, you can:

  • Buy Main Boards globally without worrying about region-specific settings.
  • Quickly adjust your camera to match the correct settings for your country.

Regional Settings Include:

  • Video System (PAL/NTSC)
  • WiFi Configuration
  • User Language
  • Date Format

Whether servicing cameras, replacing parts, or preparing a camera for resale, the Defaults and Geographical Plugin makes the process quick and hassle-free.

⬅️ Done? Use your browser’s back arrow to return.
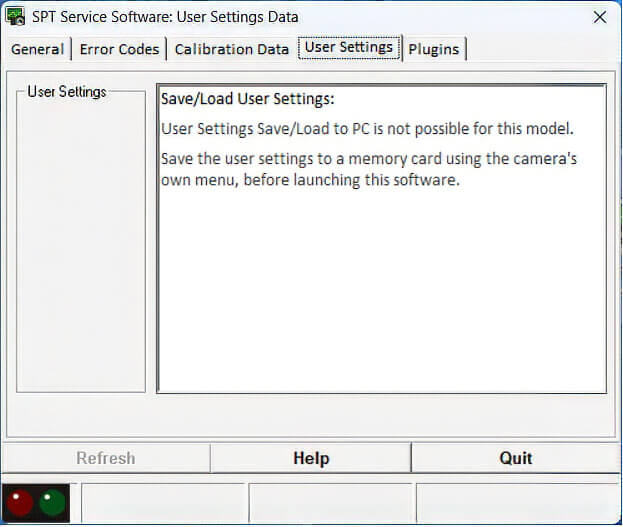
 

Save and Restore Your Customer’s Personal Settings via Memory Card

⬅️ Tip: Use your browser’s back arrow to return to the previous page anytime.


User Settings


Save and Restore Your Customer’s Personal Settings via Memory Card


Unlike earlier models, saving and loading User Settings directly to a PC via USB is not supported on the Canon EOS R6 Mark III. Instead, Canon built profile backup functionality directly into the camera's internal menu system.

Before launching this software or performing any bench adjustments, back up the owner's configuration onto a CFexpress Type B or SD card:


How to Save & Restore Settings on the R6 Mark III:


  1. Insert a Memory Card: Place a formatted shop SD or CFexpress Type B card into the camera.
  2. Back Up Camera Settings: Open the camera's Set-up (Yellow Wrench) menu, select Save/load cam settings on card, choose Save to card, and confirm OK. This preserves the owner's Custom Shooting Modes (C1–C3), video presets, button customizations, and My Menu tabs.
  3. Back Up Wireless/Network Settings (Optional): If the customer uses FTP or Wi-Fi presets, open the Network (Purple) menu and select Save/load comm. settings on card.
  4. Restore After Service: Once your mechanical calibration or Standard Defaults reset is complete, return to Save/load cam settings on card and select Load from card to restore the owner's exact setup.

⚠️ Important Bench Notes:


  • Back Up Before Resetting: Always save settings to a memory card before running the Standard Defaults Tab (included in the Defaults and Geographical Plugin) to prevent wiping customer configurations.


  • Firmware & Model Matching: Settings files saved on a card can only be reloaded onto an EOS R6 Mark III running a compatible firmware version—if your repair includes a firmware update, save the settings after updating if possible.

⬅️ Done? Use your browser’s back arrow to return.
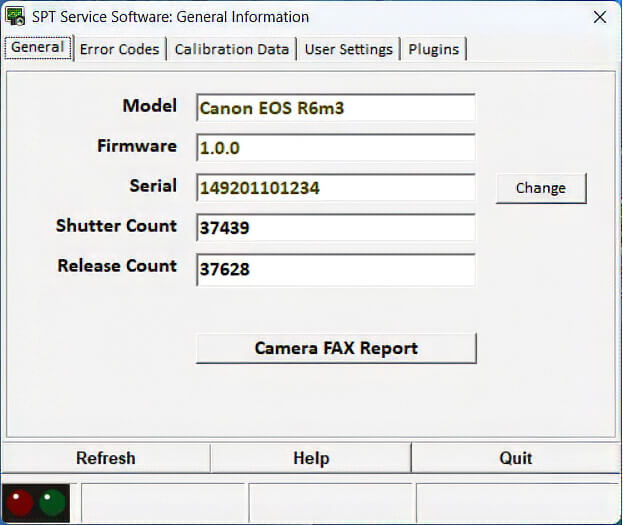
 

Canon EOS R6 Mark II General Tab / Bench Information

⬅️ Tip: Use your browser’s back arrow to return to the previous page anytime.


General

Canon EOS R6 Mark III — General Tab Overview

Canon EOS R6 Mark III — General Tab Overview

The General Tab is your primary bench dashboard for the Canon EOS R6 Mark III. It provides immediate access to hardware identity, release counts, and service documentation before and after any repair.


With the General Tab, you can:


  1. View key camera details at a glance: Instantly verify internal firmware versions, model IDs, and DIGIC X system status upon USB connection.
  2. Read the Shutter and Release Counts: Inspect both the mechanical focal-plane shutter actuations and total system releases separately.
  3. Verify or write electronic serial numbers: Match the main board's internal electronic serial number to the exterior chassis plate following a replacement main board installation.
  4. Print the Before and After Camera FAX Report: Generate clean, timestamped diagnostic sheets to document incoming condition and verify post-repair benchmarks for your client records.

⚠️ Important: Always enter a valid Canon serial number matching the physical body tag. Writing an invalid or improperly formatted serial number can cause communication faults or serious firmware lockups on the main board.


✅ YES — You can reset or modify the Total Release Count on the Canon EOS R6 Mark III, allowing you to zero out the counter cleanly after installing a new shutter assembly.


⬅️ Done? Use your browser’s back arrow to return.